반응형
안녕하세요.
지난 시간에 포톤 가입과 포톤 패키지를 연동하는 법에 대해 알아보았습니다.
이번에는 포톤에 직접 코드를 추가하여 네트워크를 연동하는 법에 대해 알아보도록 하겠습니다.
1. 연결하기
포톤에서 부여받은 appid로 연결하게 됩니다.
기본적으로 간단한 코드로 접속이 가능합니다.
Hierachy에 빈 오브젝트를 생성하고 스크립트를 넣어줍니다.
저는 PhotonTest라는 클래스를 만들어서 넣었습니다.

그리고 PhotonTest스크립트는 다음과 같이 넣습니다.
Start함수에서 포톤설정을 해서 포톤 서버에 접속하고 바로 OnConnectedToMaster 함수가 호출됩니다.
|
1
2
3
4
5
6
7
8
9
10
11
12
13
14
15
16
17
18
19
20
21
22
23
|
using System.Collections;
using System.Collections.Generic;
using UnityEngine;
using Photon.Pun;
using Photon.Realtime;
public class PhotonTest : MonoBehaviourPunCallbacks
{
void Start()
{
Screen.SetResolution(960, 600, false); // PC 실행 시 해상도 설정
PhotonNetwork.ConnectUsingSettings(); // 포톤 연결설정
}
public override void OnConnectedToMaster()
{
RoomOptions options = new RoomOptions(); // 방옵션설정
options.MaxPlayers = 5; // 최대인원 설정
PhotonNetwork.JoinOrCreateRoom("Room1", options, null); // 방이 있으면 입장하고
// 없다면 방을 만들고 입장합니다.
}
}
|
cs |
2. 닉네임으로 접속하기
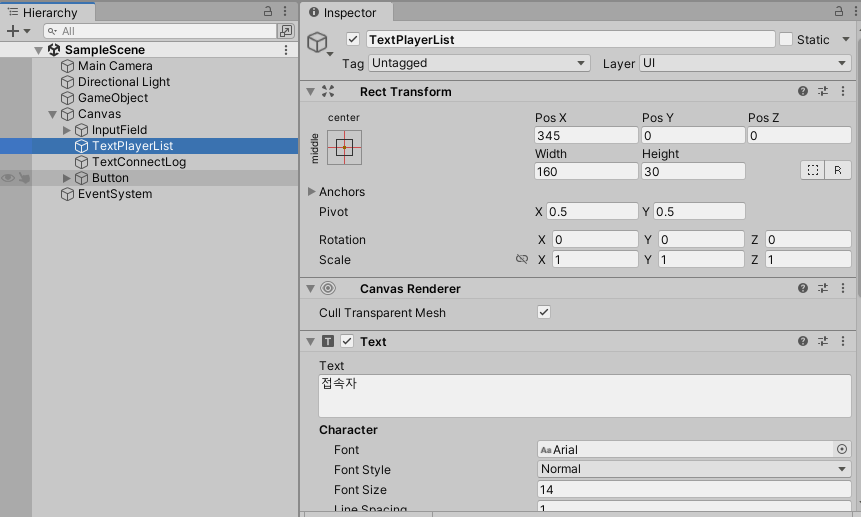
닉네임 입력 후 접속하기InputField 오브젝트를 생성해서 방에 입장하는 프로젝트를 만들어보도록 하겠습니다.UI관련 오브젝트를 생성합니다.
InputField(InputField object)


TextPlayerList(Text Object)

TextConnectLog(Text Object)

Button(Button Object)

PhotonTest script는 다음과 같이 작성합니다.
|
1
2
3
4
5
6
7
8
9
10
11
12
13
14
15
16
17
18
19
20
21
22
23
24
25
26
27
28
29
30
31
32
33
34
35
36
37
38
39
40
41
42
43
44
45
46
47
48
49
50
51
52
53
54
55
56
57
58
59
60
61
62
63
64
65
66
67
68
69
70
71
|
using System.Collections;
using System.Collections.Generic;
using UnityEngine;
using UnityEngine.UI;
using Photon.Pun;
using Photon.Realtime;
public class PhotonTest : MonoBehaviourPunCallbacks
{
InputField m_InputField;
Text m_textConnectLog;
Text m_textPlayerList;
void Start()
{
Screen.SetResolution(960, 600, false);
m_InputField = GameObject.Find("Canvas/InputField").GetComponent<InputField>();
m_textPlayerList = GameObject.Find("Canvas/TextPlayerList").GetComponent<Text>();
m_textConnectLog = GameObject.Find("Canvas/TextConnectLog").GetComponent<Text>();
m_textConnectLog.text = "접속로그\n";
}
public override void OnConnectedToMaster()
{
RoomOptions options = new RoomOptions();
options.MaxPlayers = 5;
PhotonNetwork.LocalPlayer.NickName = m_InputField.text;
PhotonNetwork.JoinOrCreateRoom("Room1", options, null);
}
public override void OnJoinedRoom()
{
updatePlayer();
m_textConnectLog.text += m_InputField.text;
m_textConnectLog.text += " 님이 방에 참가하였습니다.\n";
}
public override void OnPlayerEnteredRoom(Player newPlayer)
{
updatePlayer();
m_textConnectLog.text += newPlayer.NickName;
m_textConnectLog.text += " 님이 입장하였습니다.\n";
}
public override void OnPlayerLeftRoom(Player otherPlayer)
{
updatePlayer();
m_textConnectLog.text += otherPlayer.NickName;
m_textConnectLog.text += " 님이 퇴장하였습니다.\n";
}
public void Connect()
{
PhotonNetwork.ConnectUsingSettings();
}
void updatePlayer()
{
m_textPlayerList.text = "접속자";
for (int i = 0; i < PhotonNetwork.PlayerList.Length; i++)
{
m_textPlayerList.text += "\n";
m_textPlayerList.text += PhotonNetwork.PlayerList[i].NickName;
}
}
}
|
cs |
실행화면

반응형
'개발공부 > 유니티' 카테고리의 다른 글
| [Unity] 유니티에 PlayFab 연동하기 (0) | 2022.10.14 |
|---|---|
| [Unity] 유니티에서 포톤으로 채팅 구현 (0) | 2022.10.03 |
| [Unity] 유니티에서 포톤 연동하기(1) - 포톤 가입, 유니티에 포톤 패키지 설치 (0) | 2022.10.03 |
| [Unity] UnityEngine.Rendering.PostProcessing.AmbientOcclusion.IsEnabledAndSupported Error (2) | 2022.09.14 |
| [Unity] Unable to parse Build/xxxxx.framework.js.gz! 에러 (1) | 2022.08.31 |