반응형

안녕하세요

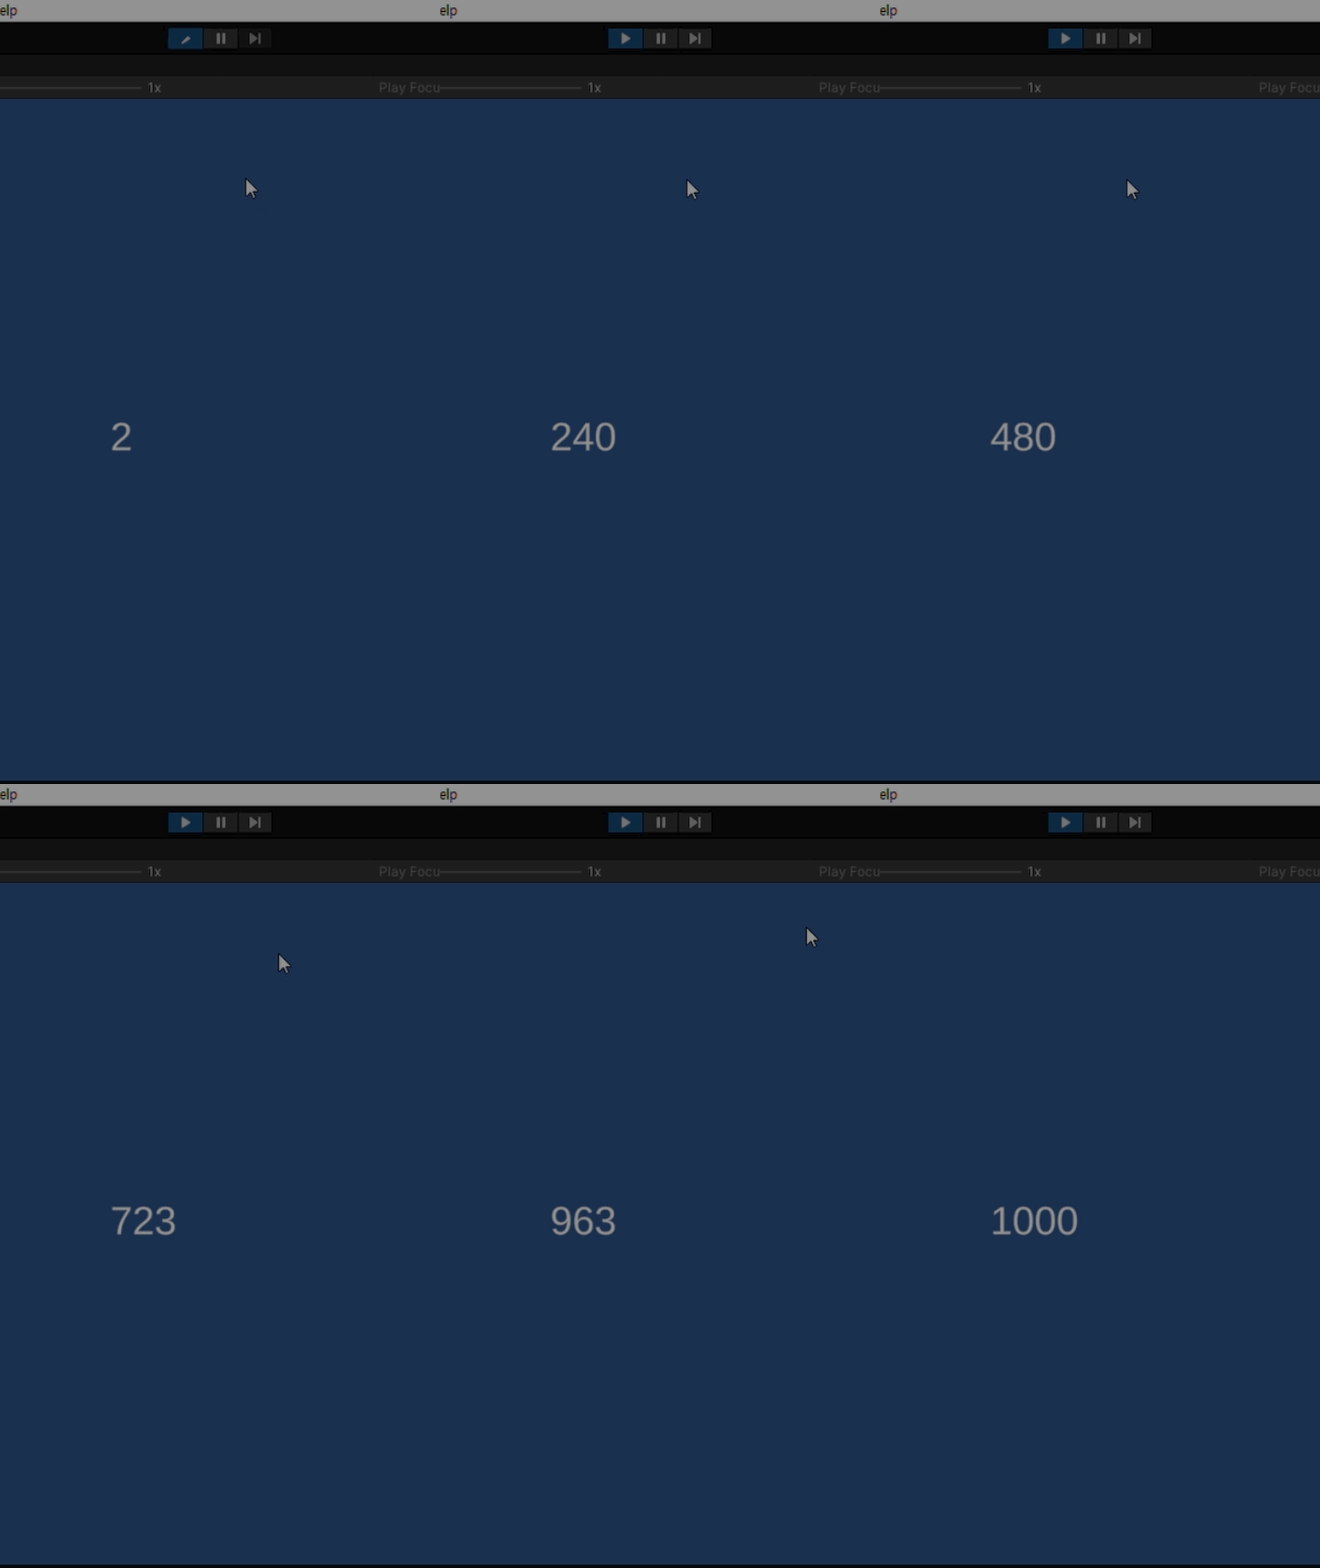
게임에서 재화를 획득하거나 게임 결과를 나타낼 때 숫자가 순차적으로 올라가는 효과가 있는데, 그걸 구현해 보도록 하겠습니다.


1. update함수를 통해서 구현

1
2
3
4
5
6
7
8
9
10
11
12
13
14
15
16
17
18
19
20
21
22
23
24
25
26
27
28
29
30
31
using System.Collections;
using System.Collections.Generic;
using UnityEngine;
using TMPro;
 
public class Counter : MonoBehaviour
{
    TMP_Text textCount;
 
    int nTargetPoint = 1000;
    float fCount = 0f;
 
    const float SPEED = 100f;
 
    void Start()
    {
        textCount = GameObject.Find("Canvas/CountText").GetComponent<TMP_Text>();
 
    }
 
    void Update()
    {
        fCount += Time.deltaTime * SPEED;
 
        if(fCount <= nTargetPoint)
        {
            textCount.text = fCount.ToString("F0");
        }
    }
}
 
cs


2. 코루틴으로 구현

1
2
3
4
5
6
7
8
9
10
11
12
13
14
15
16
17
18
19
20
21
22
23
24
25
26
27
28
29
30
31
32
33
34
using System.Collections;
using System.Collections.Generic;
using UnityEngine;
using TMPro;
 
public class Counter : MonoBehaviour
{
    TMP_Text textCount;
 
 
    const float SPEED = 100f;
 
    void Start()
    {
        textCount = GameObject.Find("Canvas/CountText").GetComponent<TMP_Text>();
        StartCoroutine(numCount(1000f));
    }
 
    IEnumerator numCount(float fTargetNum)
    {
        float fCount = 0;
 
        while (fCount <= fTargetNum)
        {
            fCount += Time.deltaTime * SPEED;
            textCount.text = fCount.ToString("F0");
            yield return null;
        }
 
        textCount.text = fTargetNum.ToString("F0");
    }
 
}
 
cs


3. 코루틴에서 WaitForSeconds 사용

1
2
3
4
5
6
7
8
9
10
11
12
13
14
15
16
17
18
19
20
21
22
23
24
25
26
27
28
29
30
31
using System.Collections;
using System.Collections.Generic;
using UnityEngine;
using TMPro;
 
public class Counter : MonoBehaviour
{
    TMP_Text textCount;
 
 
    void Start()
    {
        textCount = GameObject.Find("Canvas/CountText").GetComponent<TMP_Text>();
        StartCoroutine(numCount(1000));
    }
 
    IEnumerator numCount(int nTargetNum)
    {
        float nCount = 0;
 
        while (nCount <= nTargetNum)
        {
            nCount++;
            textCount.text = nCount.ToString();
            yield return new WaitForSeconds(0.01f);
        }
 
        textCount.text = nTargetNum.ToString();
    }
}
 
cs


4. 자리수가 순차적으로 증가


1
2
3
4
5
6
7
8
9
10
11
12
13
14
15
16
17
18
19
20
21
22
23
24
25
26
27
28
29
30
31
32
33
34
35
36
37
38
39
40
41
42
43
44
45
46
47
48
49
50
51
52
53
54
55
56
57
using System.Collections;
using System.Collections.Generic;
using UnityEngine;
using TMPro;
 
public class Counter : MonoBehaviour
{
    TMP_Text textCount;
 
 
    void Start()
    {
        textCount = GameObject.Find("Canvas/CountText").GetComponent<TMP_Text>();
        StartCoroutine(numCount(987654321));
    }


    IEnumerator numCount(int nTargetNum)
    {
 
        string str = nTargetNum.ToString();
        string str2 = "";
        textCount.text = "";
 
        int nStrLength = str.Length;
 
        int[] nDigitNum = new int[nStrLength];
 
 
        nDigitNum[0= nTargetNum / (int)Mathf.Pow(10, nStrLength - 1);
        
 
        for (int i = 0; i < nStrLength; i++)
        {
            nDigitNum[i] = nTargetNum % (int)Mathf.Pow(10, nStrLength-i) / (int)Mathf.Pow(10, nStrLength-i-1);
        }
 
        for (int i = 0; i < nStrLength; i++)
        {
            for (int j = 0; j < nDigitNum[i]; j++)
            {
                textCount.text = str2 + j.ToString();
                yield return new WaitForSeconds(0.05f);
            }
            str2 += str[i];
            textCount.text = "";
            for (int k = 0; k <= i; k++)
                textCount.text += str[k];
 
        }
        yield return null;
    }
 
 
}
 
cs
반응형
반응형

안녕하세요

메인오브젝트(MainCube)에 자식 오브젝트로 CubeL1, CubeL2, CubeR1, CubeR2를 생성합니다.

자식오브젝트인 CubeL1, CubeL2, CubeR1, CubeR2를 제거하려면 다음 코드를 사용하여 "GameManager" Object에 넣습니다.

1
2
3
4
5
6
7
8
9
10
11
12
13
14
15
16
17
18
19
20
using System.Collections;
using System.Collections.Generic;
using UnityEngine;
 
public class GameManager : MonoBehaviour
{
 
    void Start()
    {
        DestroyChildObject();
    }
 
    void DestroyChildObject()
    {
        GameObject goMain = GameObject.Find("MainCube");
 
        for (int i = 0; i < goMain.transform.childCount; i++)
            Destroy(goMain.transform.GetChild(i).gameObject);
    }
}
cs


반응형
반응형

안녕하세요.

유니티로 만든 게임에 유저의 의견은 매우 중요합니다.

오늘은 외부로 나가지 않고 게임 내에서 인앱 리뷰를 작성할 수 있도록 해보겠습니다.

일단 다음 사이트에 들어가서 인앱 리뷰 패키지를 받습니다.

https://developers.google.com/unity/packages?hl=ko#tools 


Unity용 Google 패키지 살펴보기  |  Google for Developers
이 페이지는 Cloud Translation API를 통해 번역되었습니다. Switch to English Unity용 Google 패키지 살펴보기 컬렉션을 사용해 정리하기 내 환경설정을 기준으로 콘텐츠를 저장하고 분류하세요. Unity의 Google

developers.google.com

다운로드한 패키지를 유니티 프로젝트에 임포트(import) 합니다.


그리고 코드를 입력합니다.

using Google.Play.Review; 를 맨 위에 선언해야 합니다.

1
2
3
4
5
6
7
8
9
10
11
12
13
14
15
16
17
18
19
20
21
22
23
24
25
26
27
28
29
30
31
    public void GooglePlayReview()
    {
        StartCoroutine(StartGooglePlayReview());
    }
 
 
    IEnumerator StartGooglePlayReview()
    {
        var reviewManager = new ReviewManager();
 
        var requestFlowOperation = reviewManager.RequestReviewFlow();
        yield return requestFlowOperation;
 
        if (requestFlowOperation.Error != ReviewErrorCode.NoError)
        {
            Debug.LogError("requestFlowOperation Error ::" + requestFlowOperation.Error.ToString());
            yield break;
        }
 
        var playReviewInfo = requestFlowOperation.GetResult();
 
        var launchFlowOperation = reviewManager.LaunchReviewFlow(playReviewInfo);
        yield return launchFlowOperation;
 
        if (launchFlowOperation.Error != ReviewErrorCode.NoError)
        {
            Debug.LogError("launchFlowOperation Error ::" + launchFlowOperation.Error.ToString());
            yield break;
        }
 
    }
cs

GooglePlayReview함수를 버튼에 넣거나 게임 클리어 후 넣어주면 됩니다.

유저가 게임 클리어나 미션 성공 같이 유저가 기분이 좋을 때 넣어주는 게 좋다고 합니다.

구현 코드는 다음 사이트에서 참고했습니다.

https://developer.android.com/guide/playcore/in-app-review/unity?hl=ko 


인앱 리뷰 통합(Unity)  |  Android 개발자  |  Android Developers

인앱 리뷰 통합(Unity) 컬렉션을 사용해 정리하기 내 환경설정을 기준으로 콘텐츠를 저장하고 분류하세요. 이 가이드에서는 Unity를 사용하여 앱에 인앱 리뷰를 통합하는 방법을 설명합니다. Kotlin

developer.android.com


주의점은 구글 플레이와 연동이 되야해서 내부 테스트로라도 출시해야 테스트가 가능합니다.

그리고 이미 리뷰를 작성하였다면 활성화되지 않습니다.

반응형
반응형

안녕하세요

인앱을 등록하려고 라이센스키를 등록했는데도 "you are not authorized to set the license key "가 발생했습니다.

일단 유니티 dashboard에 접속합니다.

https://dashboard.unity3d.com/


Unity Gaming Services


dashboard.unity3d.com


프로젝트 선택을 합니다.

선택 후 프로젝트를 클릭하면 해당 프로젝트로 들어갑니다

다음 화면에서 프로젝트 셋팅을 클릭합니다.


복사버튼을 클릭해서 Project ID를 복사합니다.

복사한 키를 아래 형식으로 넣고 접속합니다.

https://analytics.cloud.unity3d.com/event/복사한키 


그럼 다음과 같은 사이트로 이동합니다.


다시 유니티로 돌아가서, 라이센스키를 넣고 업데이트 합니다.


반응형
반응형

안녕하세요.

인앱 상품을 추가하려고 하는데 다음과 같은 메세지 구글 개발자 콘솔에 나왔습니다.

AndroidManifest.xml에 결제 권한을 줘야합니다. 

Asset/Plugins/Andrioid/AndroidManifest.xml 을 열어서 다음 구문을 추가합니다.

1
<uses-permission android:name="com.android.vending.BILLING"/>
cs

저는 다음과 같이 추가했습니다.

1
2
3
4
5
6
7
8
9
10
11
12
13
14
15
16
17
<?xml version="1.0" encoding="utf-8"?>
<manifest
    xmlns:android="http://schemas.android.com/apk/res/android"
    package="com.unity3d.player"
    xmlns:tools="http://schemas.android.com/tools">
      <uses-permission android:name="com.android.vending.BILLING"/>
    <application>
        <activity android:name="com.unity3d.player.UnityPlayerActivity"
                  android:theme="@style/UnityThemeSelector">
            <intent-filter>
                <action android:name="android.intent.action.MAIN" />
                <category android:name="android.intent.category.LAUNCHER" />
            </intent-filter>
            <meta-data android:name="unityplayer.UnityActivity" android:value="true" />
        </activity>
    </application>
</manifest>
cs

만약 Asset/Plugins/Andrioid/AndroidManifest.xml 가 없다면

Project Settings에 들어가서 Player > Publishing Setting > Build에 Custom Main Manifest를 체크해주면 추가가 됩니다.


반응형
반응형

안녕하세요

유니티 안드로이드 인앱 결제에 대해 알아보도록 하겠습니다.

1. 인앱결제 패키지 설치하기

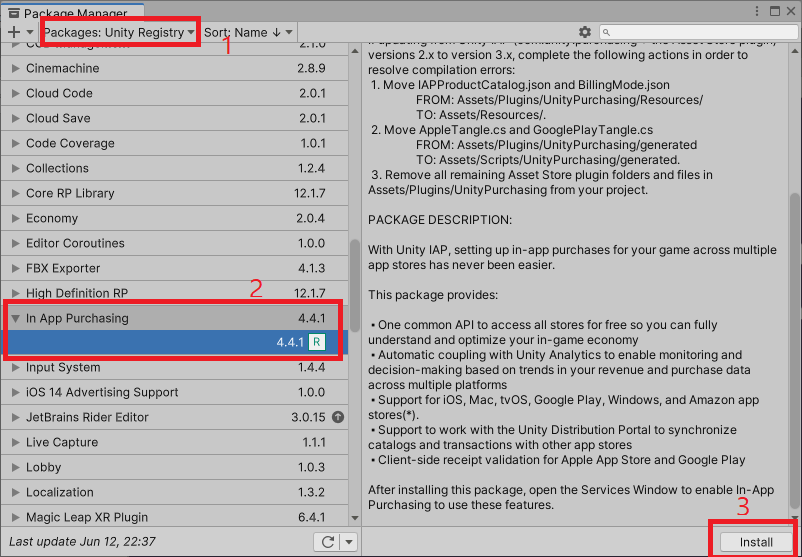
메뉴 - Window - Package Manager를 통해 패키지 매니저로 들어갑니다.

패키지 매니저 창에서 Unity Registory를 선택하고 In App Purchasing를 Install 합니다.

설치가 완료되면 다음과 같은 창이 뜨는데 Project Settings 버튼을 누릅니다.

Select organization 리스트 박스를 눌러서 로그인된 계정을 선택해 준 후 Create project ID를 클릭합니다.

그 후 13세 어린이를 대상으로 한다면 Yes를 선택해 줍니다. 아니면 No를 선택한 후 Save버튼을 클릭합니다.

OFF를 클릭하여 ON으로 변경합니다.

이제 다음과 같은 화면이 Licence Key를 넣어줘야 하는데 다음과정을 통해서 받아옵니다.


2. 구글 개발자 콘솔에 접속해서 Licence Key 받아오기

구글 개발자 콘솔에 접속합니다.

https://play.google.com/apps/publish/


Google Play Console | Google Play Console

앱과 게임이 성장할 수 있도록 사용자에게 도달하고 사용자 참여를 유도하는 데 도움이 될 도구, 프로그램, 통계를 이용하세요.

play.google.com


게임을 등록하지 않았다면 등록을 해야 확인할 수 있습니다.

게임에 결제권한을 줘야 인앱결제가 가능합니다.

권한주는 법은 다음페이지에서 확인할 수 있습니다.


[Unity] 인앱 상품을 추가하려면 결제 권한을 APK에 추가해야 합니다.

안녕하세요. 인앱 상품을 추가하려고 하는데 다음과 같은 메세지 구글 개발자 콘솔에 나왔습니다. AndroidManifest.xml에 결제 권한을 줘야합니다. Asset/Plugins/Andrioid/AndroidManifest.xml 을 열어서 다음 구

scvtwo.tistory.com


인앱 결제를 사용할 앱에 접속하여(이미 게임이 구글 플레이에 등록되어 있다고 가정합니다), 수익 창출을 클릭합니다.


 라이센스키를 복사합니다.

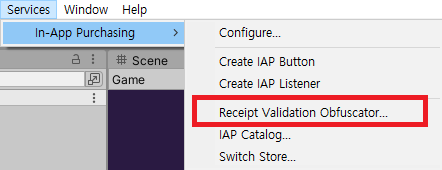
유니티로 돌아가서 메뉴 - Services - In-App Purchasing - Receipt Validation Obfuscator을 클릭해 줍니다.

 복사한 키를 1번에 붙여 넣고 Obfuscate Google Play License Key 버튼을 클릭합니다.

메뉴 - Edit - Project Setting - In-App Purchasing에 들어가서 키를 붙여 넣습니다.

다음과 같은 상태가 됩니다.


3. 개발자 콘솔에서 인앱 상품 만들기

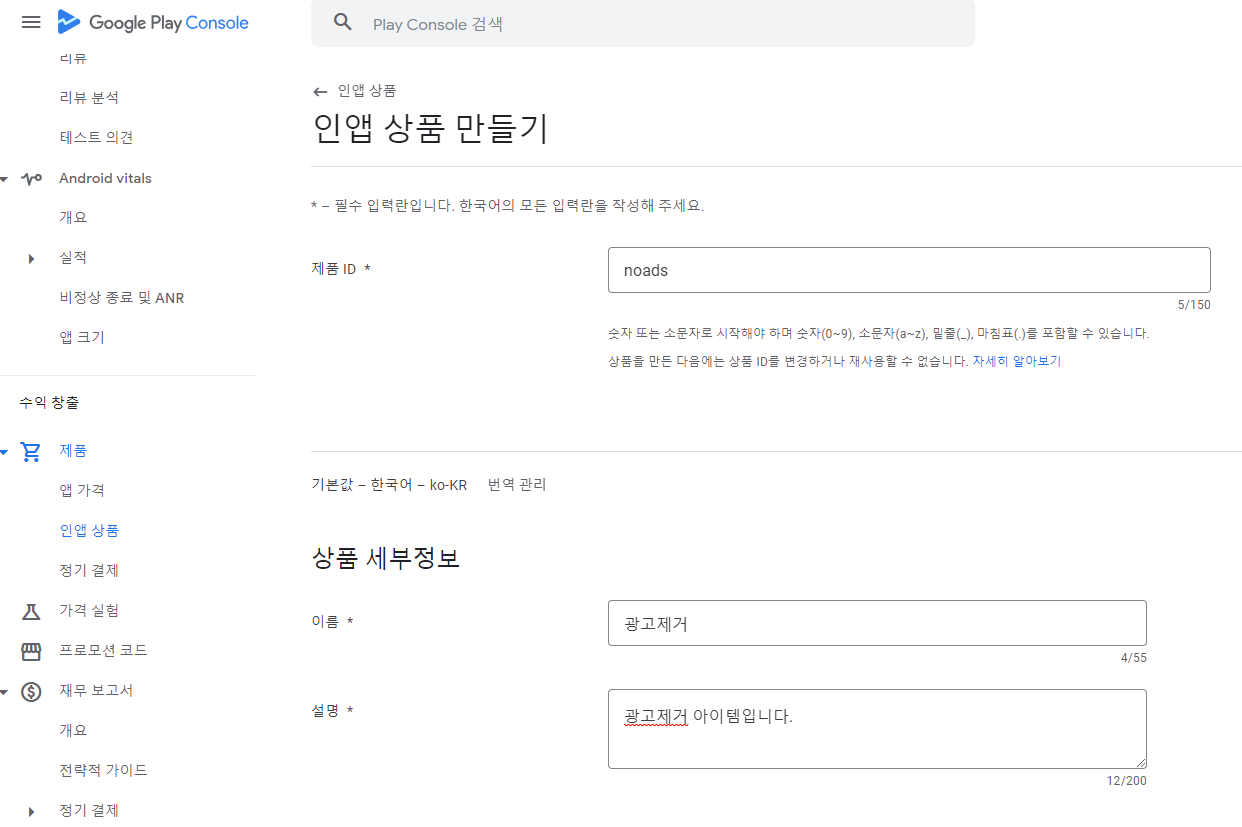
개발자 콘솔로 접속하여 해당 앱에 들어가서 수익 > 제품 > 인앱 상품에 들어갑니다.

상품 정보와 상품 가격을 입력 후 저장하기를 클릭합니다

저장 후에 비활성화되어있기 때문에 다시 상품으로 들어가서 "활성화"버튼을 눌러줍니다.


활성화된 것을 확인합니다.

4. 유니티로 돌아가서 구매 버튼을 만들기

코드로도 추가할 수 있지만 코드 없이 간단하게 버튼을 추가해서 구매를 확인해 보도록 하겠습니다.

메뉴 - Services - In-App Purchasing - Create IAP Button으로 버튼을 추가합니다.


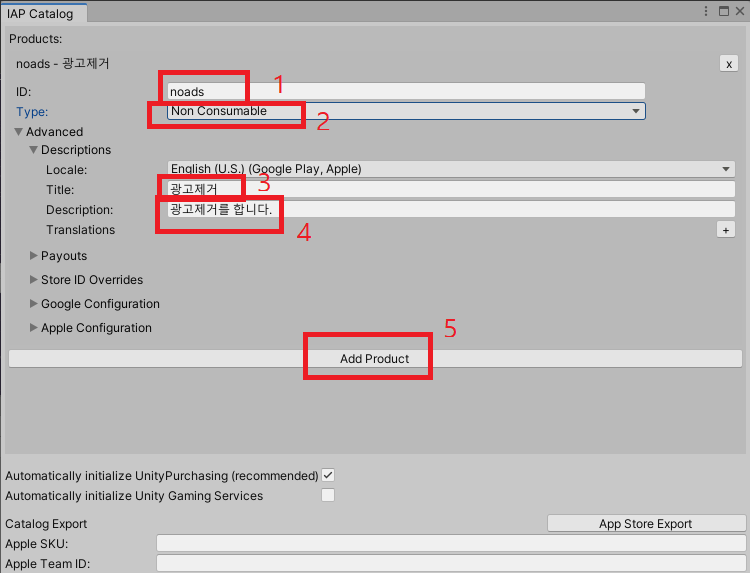
추가한 버튼의 Inspector창에서 IAP Catalog.. 버튼을 클릭합니다.

개발자 콘솔에 추가한 제품 ID를 넣고 Type은 Consumable(소모품), Non Consumable(비소모품), Subscription(구독)을 선택한 후 제목, 설명을 추가 후 "Add Product"을 클릭합니다.


그리고 Inspector에 추가한 Project ID를 선택합니다.


게임을 다시 빌드한 후 출시를 합니다.

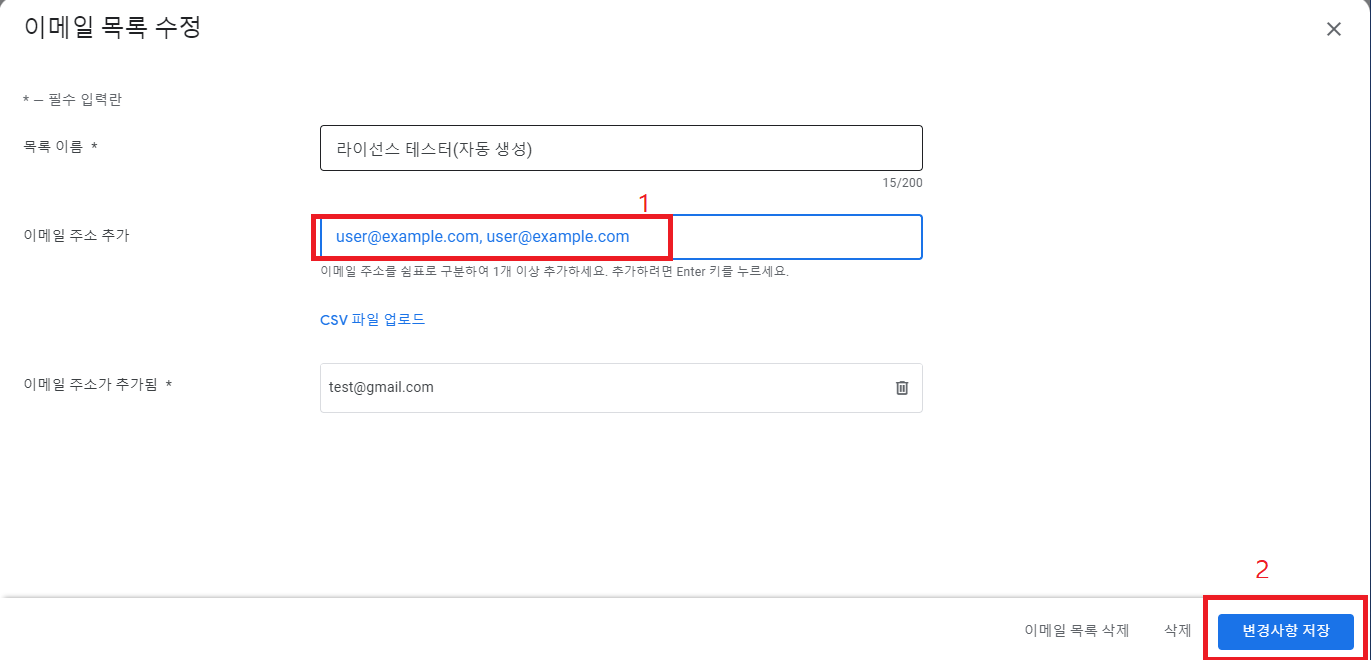
테스트 계정을 "라이선스 테스트"에 추가합니다.

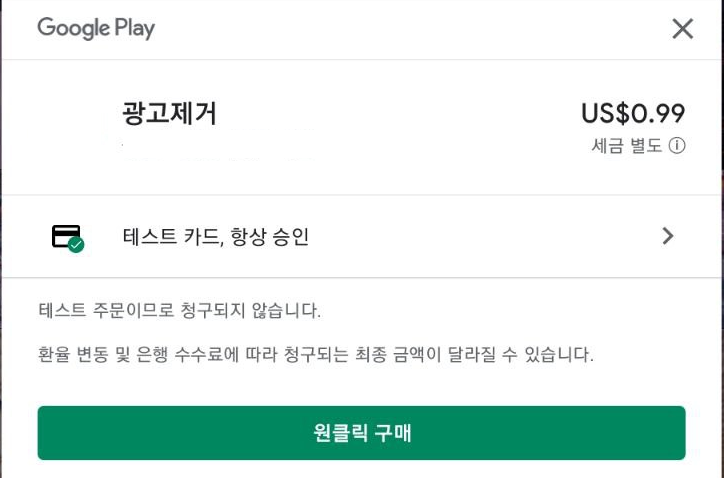
추가한 버튼을 누르면 다음과 같이 테스트 카드 승인 화면이 뜹니다.

반응형
반응형

씬마다 다른 화면 고정을 적용하려면 다음과 같이 합니다.

직접 프로젝트를 만들면서 알아보도록 하겠습니다.

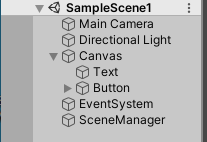
1. 어떤 씬인지 확인을 위해서 텍스트 오브젝트, 그리고 씬 이동을 위해서 버튼 오브젝트, 스크립트를 넣기 위한 빈오브젝트를 생성합니다.

2. 동일한 씬을 추가합니다.


3. SampleScene1의 SceneManger에는 다음 스크립트를 넣어줍니다.

using System.Collections;
using System.Collections.Generic;
using UnityEngine;
using UnityEngine.SceneManagement;

public class SceneManager1 : MonoBehaviour
{
    void Start()
    {
        Screen.orientation = ScreenOrientation.Landscape;
    }

    public void SceneMove()
	{
        SceneManager.LoadScene(1);
	}
}

4. SampleScene2의 SceneManger에는 다음 스크립트를 넣어줍니다.

using System.Collections;
using System.Collections.Generic;
using UnityEngine;
using UnityEngine.SceneManagement;

public class SceneManager2 : MonoBehaviour
{
    void Start()
    {
        Screen.orientation = ScreenOrientation.Portrait;
    }

    public void SceneMove()
	{
        SceneManager.LoadScene(0);
	}
}


4. 버튼 오브젝트의 OnClick에 SceneMove함수를 넣어줍니다.

5. 버튼을 누르면 씬이동하면서 화면이 첫 번째 씬에서는 가로로 고정되고, 두 번째 씬에서는 세로로 고정되는 것을 확인할 수 있습니다.

반응형
반응형

Unity를 2021.3.9f로 업그레이드 한 후 발생한 에러입니다.

Exception: OBSOLETE - Providing Android resources in Assets/Plugins/Android/res was removed, please move your resources to an AAR or an Android Library. See "AAR plug-ins and Android Libraries" section of the Manual for more details.

해결책은 다음과 같습니다.

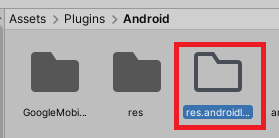
1. res가 있는 폴더 (Assets/Plugins/Android/)에 res.androidlib 폴더를 생성합니다.

2. res폴더를 res.androidlib로 옮깁니다.

3. AndroidManifest.xml, project.properties 파일을 메모장으로 해당 폴더에 생성한 후 다음과 같이 작성합니다.


AndroidManifest.xml

<?xml version="1.0" encoding="utf-8"?>
<manifest xmlns:android="http://schemas.android.com/apk/res/android"
	package="custom.android.res" android:versionCode="1" android:versionName="1.0">
</manifest>

project.properties

target=android-9
android.library=true
반응형
반응형

Unity 버전 업그레이드를 하는 도중에 발생한 에러입니다. (2019.2.9f1 -> 2020.3.19f)

다음 과정으로 해결합니다.

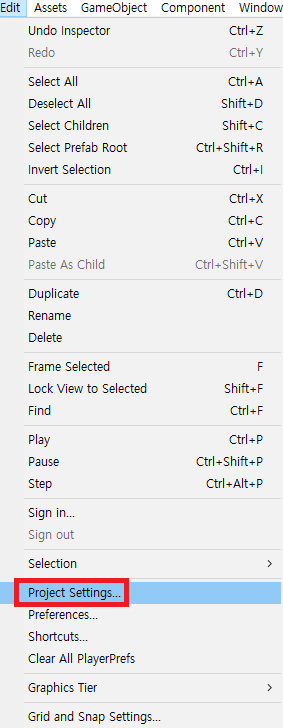
1. 메뉴 - Edit - Project Settings

2. Player - Other Settings 클릭

3. Use Deterministic Compilation 체크 해제 합니다.


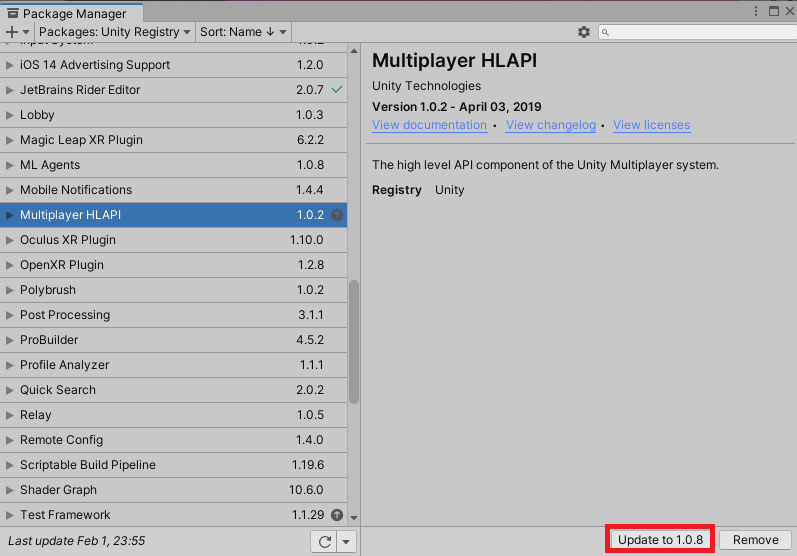
4. 메뉴 - Window - Package Manager를 선택합니다.

5. Multiplayer HLAPI를 업데이트 합니다.

반응형
반응형

안녕하세요

유니티에서 PlayFab을 연동해보도록 하겠습니다.

일단 PlayFab 사이트에 가서 가입을 해야합니다.

https://playfab.com/


Full Stack LiveOps, Real-Time Control

PlayFab is a suite of products that complement your existing backend infrastructure. Mix and match to meet your needs, or adopt the entire platform as a powerful base for current and future games.

playfab.com


가입 후 이메일 인증을 하고나면 다음과 같은 화면이 나옵니다.

기본적으로 만들어져있는 My Game으로 작업을 해도 되고, "New Studio"버튼을 눌러서 새로운 프로젝트를 만들어도 됩니다.

그 후 "Take our Tutorial"을 클릭합니다.


Turtorial 페이지가 나옵니다.

여기서 SDKs > PlayFab SDKs > Game engines > Unity3D > Quickstart로 이동해서 "PlayFab Unity Editor Extensions Asset Package"를 클릭 후 유니티 패키지를 다운로드 받습니다.

그리고 실행해서 PlayFab을 사용할 유니티 프로젝트에 해당 패키지를 임포트합니다.

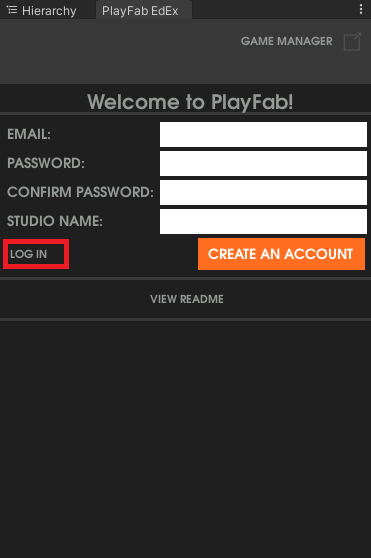
임포트를 하면 다음과 같은 창이 나타나는데, 회원가입창이기 때문에 로그인창으로 이동해야 합니다. 로그인 창으로 이동을 위해서  "LOG IN"을 클릭합니다.

회원가입 시 등록했던 이메일과 패스워드를 입력해서 로그인합니다.

로그인을 하면 "No SDK is installed."이라고 뜨면서 SDK가 설치되지 않았다고 뜨는데, "Install PlayFab SDK"버튼을 클릭합니다.

SDK설치가 완료되면 다음과 같이 창이 바뀌게 되는데, 여기서 "SETTINGS" 탭을 클릭합니다.

여기서 추가했던 STUDIO로 변경해줍니다.

다음과 같은 형식이 됩니다.

연결을 확인하기 위해서 빈오브젝트를 생성하고 스크립트를 추가합니다.


1
2
3
4
5
6
7
8
9
10
11
12
13
14
15
16
17
18
19
20
21
22
23
24
25
26
27
28
29
30
31
using PlayFab;
using PlayFab.ClientModels;
using UnityEngine;
 
public class PlayFabLogin : MonoBehaviour
{
    public void Start()
    {
        if (string.IsNullOrEmpty(PlayFabSettings.staticSettings.TitleId)){
            /*
            Please change the titleId below to your own titleId from PlayFab Game Manager.
            If you have already set the value in the Editor Extensions, this can be skipped.
            */
            PlayFabSettings.staticSettings.TitleId = "42";
        }
        var request = new LoginWithCustomIDRequest { CustomId = "GettingStartedGuide", CreateAccount = true};
        PlayFabClientAPI.LoginWithCustomID(request, OnLoginSuccess, OnLoginFailure);
    }
 
    private void OnLoginSuccess(LoginResult result)
    {
        Debug.Log("Congratulations, you made your first successful API call!");
    }
 
    private void OnLoginFailure(PlayFabError error)
    {
        Debug.LogWarning("Something went wrong with your first API call.  :(");
        Debug.LogError("Here's some debug information:");
        Debug.LogError(error.GenerateErrorReport());
    }
}
cs


실행 후 콘솔에 "Congratulations, you made your first successful API call!" 

가 출력되면 연동에 성공했다는 것을 의미합니다. 

반응형
반응형

안녕하세요.

유니티에서 포톤서버를 이용해서 채팅을 구현해보도록 하겠습니다.

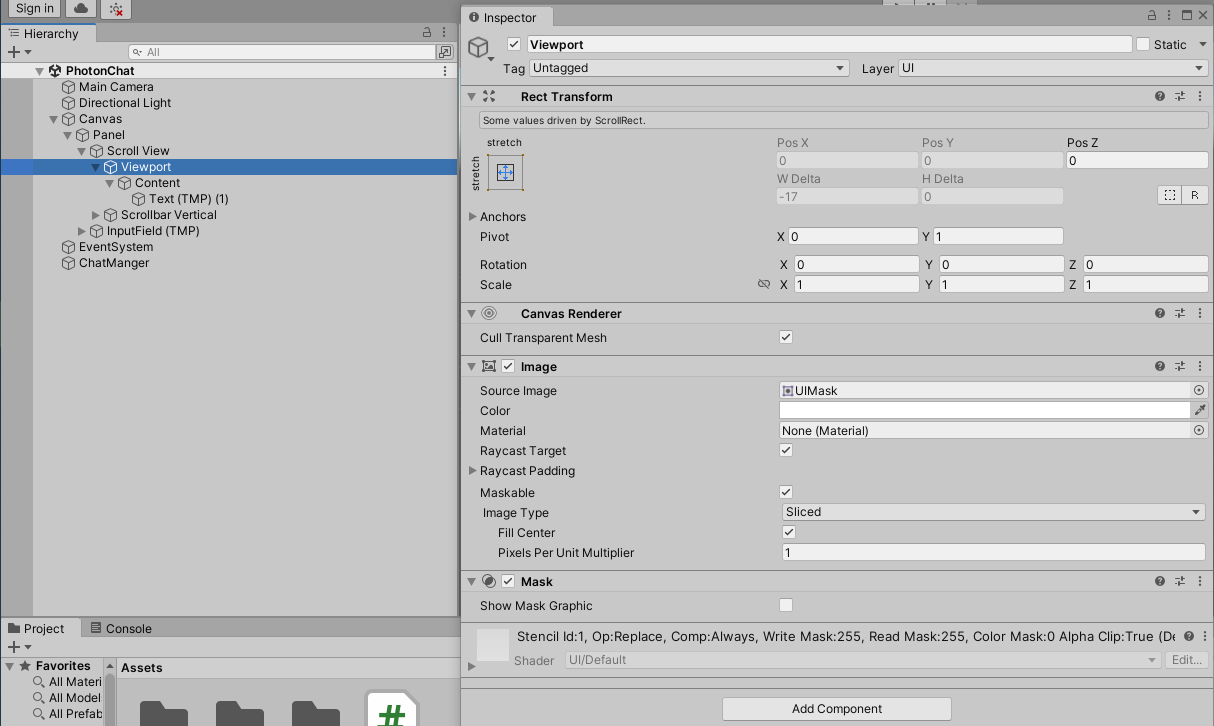
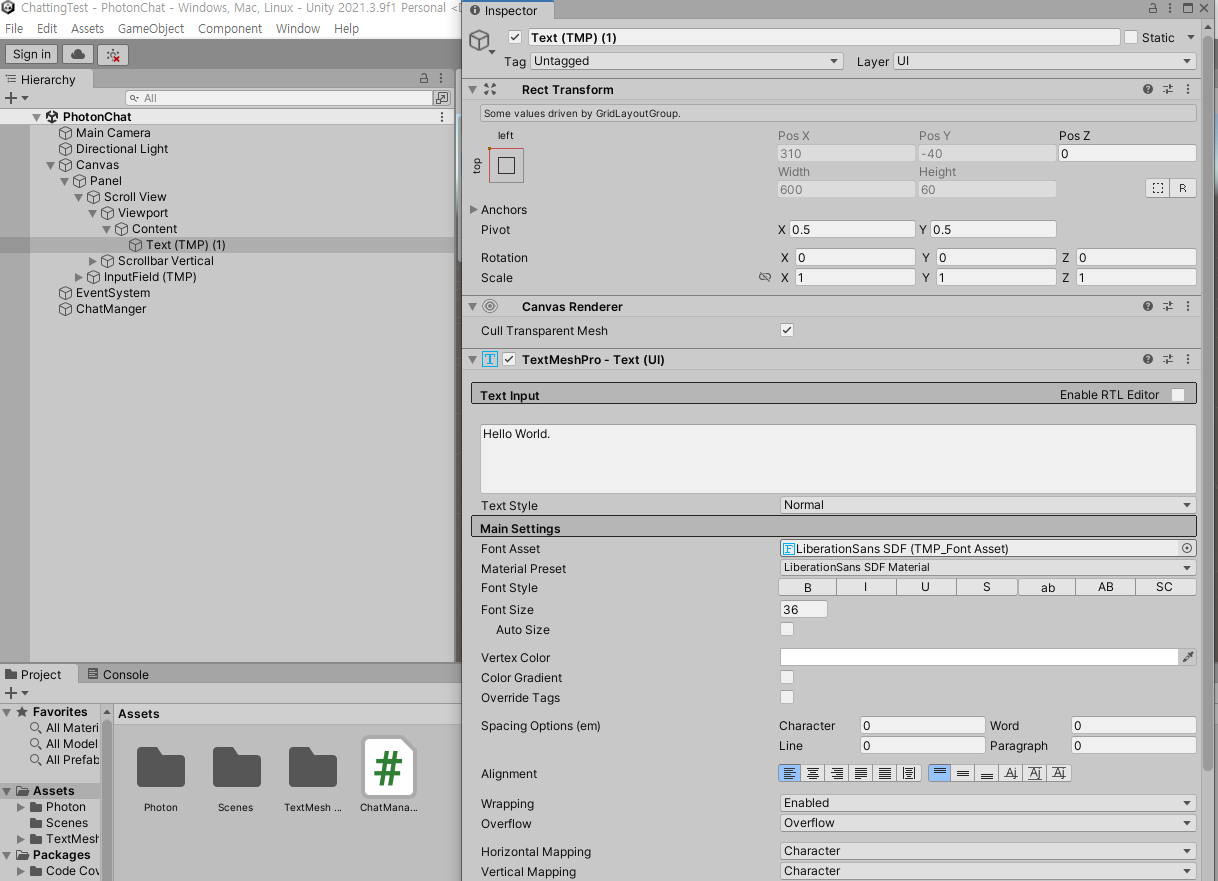
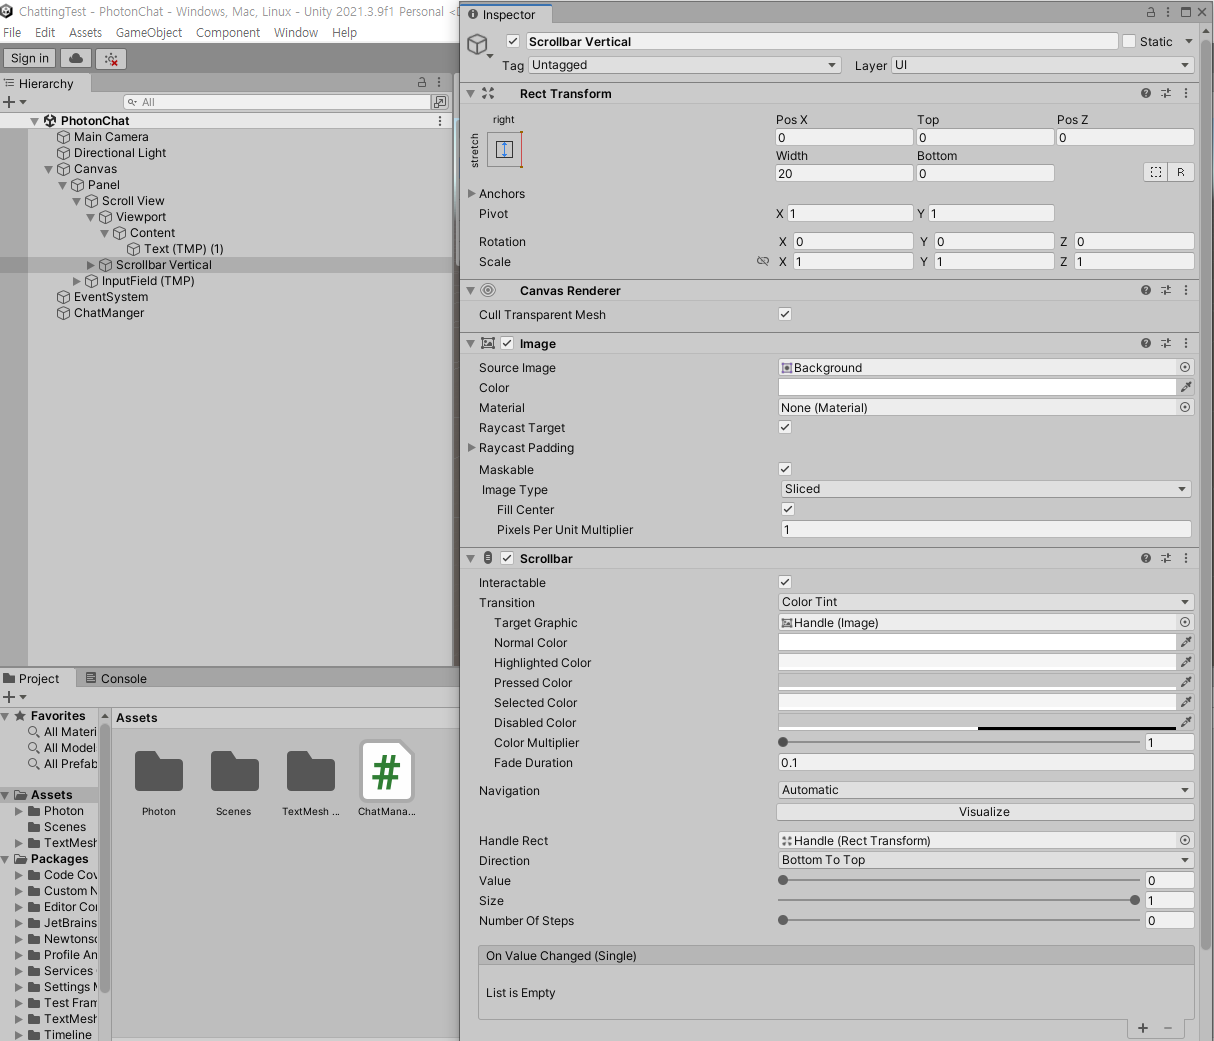
일단 오브젝트를 생성합니다.

1. Panel

1-1. Scroll View

1-1-1 Viewport

1-1-1-1 Content

1-1-1-1-1 Text(TMP) (1)

1-1-2 Scrollbar Vertical

1-2 InputField (TMP)

2. ChatManager


ChatManager 스크립트는 다음과 같이 작성합니다.

1
2
3
4
5
6
7
8
9
10
11
12
13
14
15
16
17
18
19
20
21
22
23
24
25
26
27
28
29
30
31
32
33
34
35
36
37
38
39
40
41
42
43
44
45
46
47
48
49
50
51
52
53
54
55
56
57
58
59
60
61
62
63
64
65
66
67
68
69
70
71
72
73
74
75
76
77
78
79
80
using System.Collections;
using System.Collections.Generic;
using UnityEngine;
using Photon.Pun;
using Photon.Realtime;
using TMPro;
 
public class ChatManager : MonoBehaviourPunCallbacks
{
    public GameObject m_Content;
    public TMP_InputField m_inputField;
 
    PhotonView photonview;
 
    GameObject m_ContentText;
 
    string m_strUserName;
 
 
    void Start()
    {
        Screen.SetResolution(960600false);
        PhotonNetwork.ConnectUsingSettings();
        m_ContentText = m_Content.transform.GetChild(0).gameObject;
        photonview = GetComponent<PhotonView>();
    }
 
    void Update()
    {
        if (Input.GetKeyDown(KeyCode.Return) && m_inputField.isFocused == false)
        {
            m_inputField.ActivateInputField();
        }
    }
    public override void OnConnectedToMaster()
    {
        RoomOptions options = new RoomOptions();
        options.MaxPlayers = 5;
 
        int nRandomKey = Random.Range(0100);
 
        m_strUserName = "user" + nRandomKey;
 
        PhotonNetwork.LocalPlayer.NickName = m_strUserName;
        PhotonNetwork.JoinOrCreateRoom("Room1", options, null);
    }
 
    public override void OnJoinedRoom()
    {
        AddChatMessage("connect user : " + PhotonNetwork.LocalPlayer.NickName);
    }
 
    public void OnEndEditEvent()
    {
        if (Input.GetKeyDown(KeyCode.Return))
        {
            string strMessage = m_strUserName + " : " + m_inputField.text;
 
            photonview.RPC("RPC_Chat", RpcTarget.All, strMessage);
            m_inputField.text = "";
        }
    }
 
    void AddChatMessage(string message)
    {
        GameObject goText = Instantiate(m_ContentText, m_Content.transform);
 
        goText.GetComponent<TextMeshProUGUI>().text = message;
        m_Content.GetComponent<RectTransform>().anchoredPosition = Vector3.zero;
        
    }
 
    [PunRPC]
    void RPC_Chat(string message)
    {
        AddChatMessage(message);
    }
 
}
 
cs

반응형
반응형

안녕하세요.

지난 시간에 포톤 가입과 포톤 패키지를 연동하는 법에 대해 알아보았습니다.

이번에는 포톤에 직접 코드를 추가하여 네트워크를 연동하는 법에 대해 알아보도록 하겠습니다.

1. 연결하기

포톤에서 부여받은 appid로 연결하게 됩니다.

기본적으로 간단한 코드로 접속이 가능합니다.

Hierachy에 빈 오브젝트를 생성하고 스크립트를 넣어줍니다.

저는 PhotonTest라는 클래스를 만들어서 넣었습니다.

그리고 PhotonTest스크립트는 다음과 같이 넣습니다.


Start함수에서 포톤설정을 해서 포톤 서버에 접속하고 바로 OnConnectedToMaster 함수가 호출됩니다.

1
2
3
4
5
6
7
8
9
10
11
12
13
14
15
16
17
18
19
20
21
22
23
using System.Collections;
using System.Collections.Generic;
using UnityEngine;
using Photon.Pun;
using Photon.Realtime;
 
public class PhotonTest : MonoBehaviourPunCallbacks
{
    void Start()
    {
        Screen.SetResolution(960600false); // PC 실행 시 해상도 설정
       PhotonNetwork.ConnectUsingSettings(); // 포톤 연결설정
    }
 
    public override void OnConnectedToMaster()
    {
        RoomOptions options = new RoomOptions(); // 방옵션설정
        options.MaxPlayers = 5// 최대인원 설정
        PhotonNetwork.JoinOrCreateRoom("Room1", options, null); // 방이 있으면 입장하고 
                                                                // 없다면 방을 만들고 입장합니다.
    }
 
}
cs


2. 닉네임으로 접속하기

 
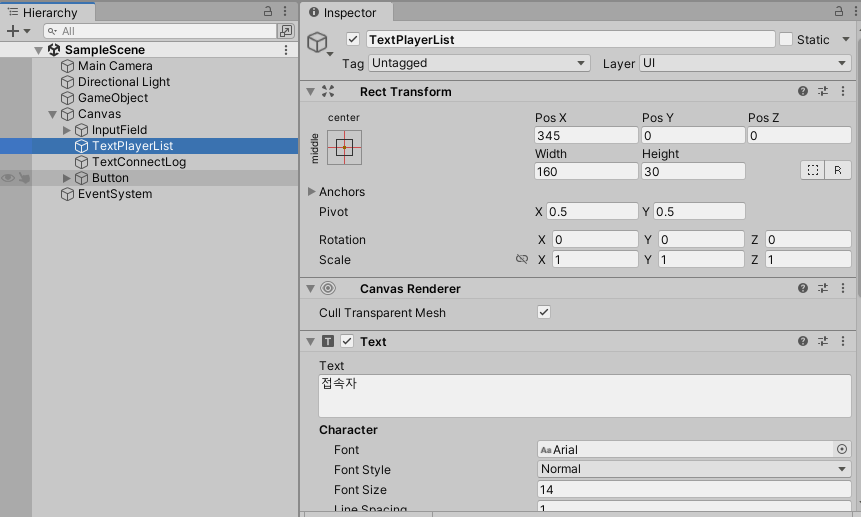
닉네임 입력 후 접속하기InputField 오브젝트를 생성해서 방에 입장하는 프로젝트를 만들어보도록 하겠습니다.UI관련 오브젝트를 생성합니다.


InputField(InputField object)


TextPlayerList(Text Object)


TextConnectLog(Text Object)


Button(Button Object)


PhotonTest script는 다음과 같이 작성합니다.

1
2
3
4
5
6
7
8
9
10
11
12
13
14
15
16
17
18
19
20
21
22
23
24
25
26
27
28
29
30
31
32
33
34
35
36
37
38
39
40
41
42
43
44
45
46
47
48
49
50
51
52
53
54
55
56
57
58
59
60
61
62
63
64
65
66
67
68
69
70
71
using System.Collections;
using System.Collections.Generic;
using UnityEngine;
using UnityEngine.UI;
using Photon.Pun;
using Photon.Realtime;
 
public class PhotonTest : MonoBehaviourPunCallbacks
{
    InputField m_InputField;
    Text m_textConnectLog;
    Text m_textPlayerList;
    
    void Start()
    {
        Screen.SetResolution(960600false);
 
        m_InputField = GameObject.Find("Canvas/InputField").GetComponent<InputField>();
        m_textPlayerList = GameObject.Find("Canvas/TextPlayerList").GetComponent<Text>();
        m_textConnectLog = GameObject.Find("Canvas/TextConnectLog").GetComponent<Text>();
 
        m_textConnectLog.text = "접속로그\n";
    }
 
    public override void OnConnectedToMaster()
    {
        RoomOptions options = new RoomOptions();
        options.MaxPlayers = 5;
 
        PhotonNetwork.LocalPlayer.NickName = m_InputField.text;
        PhotonNetwork.JoinOrCreateRoom("Room1", options, null);
        
    }
    public override void OnJoinedRoom()
    {
        updatePlayer();
        m_textConnectLog.text += m_InputField.text;
        m_textConnectLog.text += " 님이 방에 참가하였습니다.\n";
    }
 
    public override void OnPlayerEnteredRoom(Player newPlayer)
    {
        updatePlayer();
        m_textConnectLog.text += newPlayer.NickName;
        m_textConnectLog.text += " 님이 입장하였습니다.\n";
    }
 
    public override void OnPlayerLeftRoom(Player otherPlayer)
    {
        updatePlayer();
        m_textConnectLog.text += otherPlayer.NickName;
        m_textConnectLog.text += " 님이 퇴장하였습니다.\n";
    }
 
    public void Connect()
    {
        PhotonNetwork.ConnectUsingSettings();
    }
    
    void updatePlayer()
    {
        m_textPlayerList.text = "접속자";
        for (int i = 0; i < PhotonNetwork.PlayerList.Length; i++)
        {
            m_textPlayerList.text += "\n";
            m_textPlayerList.text += PhotonNetwork.PlayerList[i].NickName;
        }
    }
 
}
 
cs


실행화면

반응형
반응형


안녕하세요.

유니티에서 네트워크가 가능한 게임을 만들기 위해서는 서버가 필요합니다.

쉽게 유니티에 적용할 수 있는 솔루션인 포톤에 대해 알아보겠습니다.

1. 포톤 회원 가입 후 어플리케이션 만들기

https://www.photonengine.com/ko-KR/ 에 접속하여 회원가입을 합니다.


글로벌 크로스 플랫폼 실시간 게임 개발 | Photon Engine


www.photonengine.com

이메일을 등록하고 이메일로 인증해서 패스워드를 입력하면 바로 가입이 가능합니다.

그리고 로그인을 합니다.

관리 화면 이동을 클릭합니다.

관리화면에서 새 애플리케이션 만들기를 클릭합니다.

Photon 종류를 선택하고 어플레케이션 명을 입력 후 작성하기를 클릭하면 애플리케이션이 만들어집니다.


유니티와의 연결을 위해서는 어플리케이션 ID가 필요하기 때문에 위에 "e8c5d71c"(고유키라서 프로젝트마다 다르게 출력됩니다) 부분을 클릭해서 복사해둡니다.


2. Unity에서 Photon package 설치

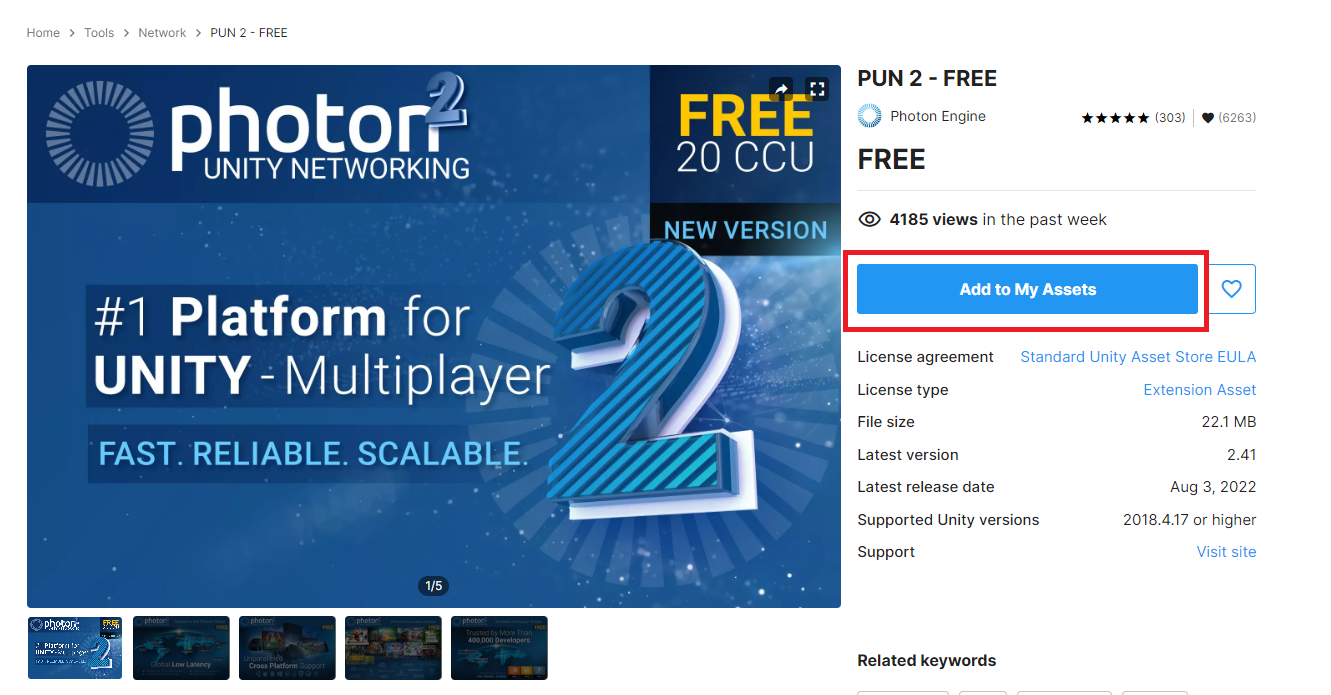
unity asset store에서 "PUN 2"라고 검색합니다.

https://assetstore.unity.com/


에셋스토어

여러분의 작업에 필요한 베스트 에셋을 찾아보세요. 유니티 에셋스토어가 2D, 3D 모델, SDK, 템플릿, 툴 등 여러분의 콘텐츠 제작에 날개를 달아줄 다양한 에셋을 제공합니다.

assetstore.unity.com

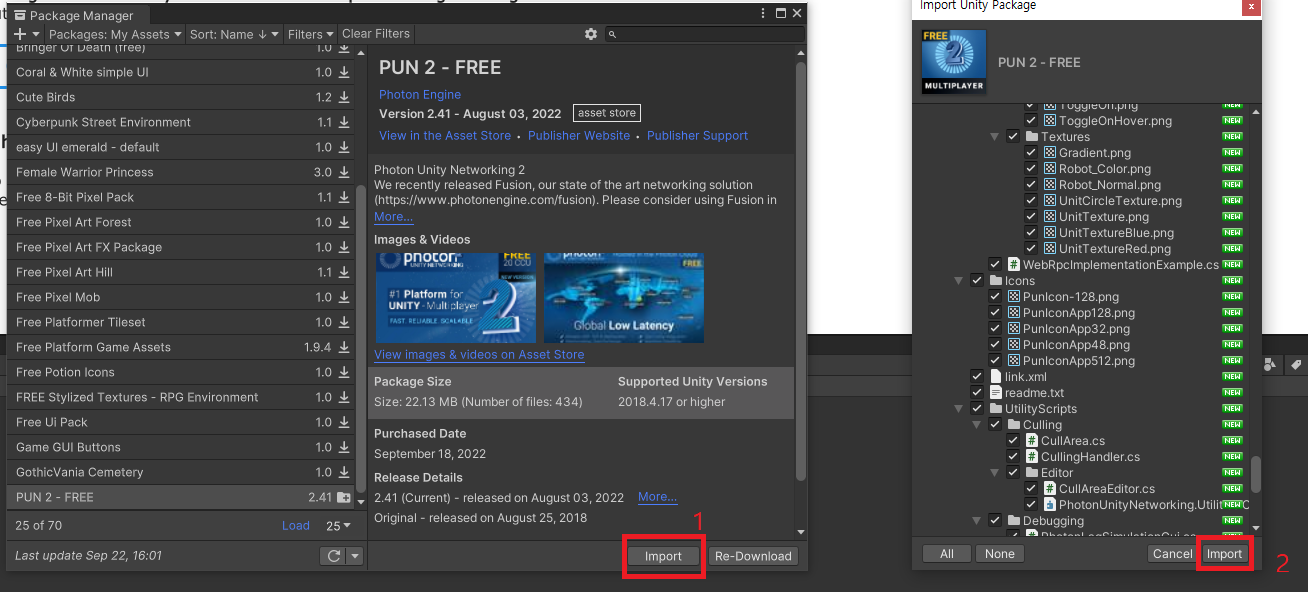
unity에 연결하여 PUN 2 패키지를 import해줍니다.

import가 완료되면 PUN Wizard창이 열리는데 위에 복사해놓았던 appid("e8c5d71c") 값을 넣어준 후 Setup Project 버튼을 눌러줍니다.

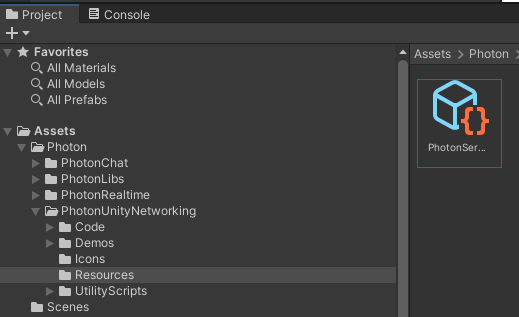
만약에 잘못해서 스킵을 하거나 창을 닫았을 경우에는 Asset\Photon\Resources\경로에 PhotonServerSettings을 선택해서 server/Cloud Setting - App id PUN에 입력하면 됩니다.


기본적인 프로젝트에 포톤 서버를 유니티에서 세팅하는 방법이었습니다.

다음 시간에는 스크립트에 코드를 넣고 연동하는 법에 대해 알아보도록 하겠습니다.

반응형
반응형

안녕하세요

postprocessing 관련 오류 발생하였습니다.

실행은 되긴하는데, 자꾸 오류가 발생되어서 발생안하게 하고싶습니다.

NullReferenceException: Object reference not set to an instance of an object
UnityEngine.Rendering.PostProcessing.AmbientOcclusion.IsEnabledAndSupported (UnityEngine.Rendering.PostProcessing.PostProcessRenderContext context) (at Library/PackageCache/com.unity.postprocessing@3.2.2/PostProcessing/Runtime/Effects/AmbientOcclusion.cs:183)
UnityEngine.Rendering.PostProcessing.PostProcessLayer.SetLegacyCameraFlags (UnityEngine.Rendering.PostProcessing.PostProcessRenderContext context) (at Library/PackageCache/com.unity.postprocessing@3.2.2/PostProcessing/Runtime/PostProcessLayer.cs:816)
UnityEngine.Rendering.PostProcessing.PostProcessLayer.SetupContext (UnityEngine.Rendering.PostProcessing.PostProcessRenderContext context) (at Library/PackageCache/com.unity.postprocessing@3.2.2/PostProcessing/Runtime/PostProcessLayer.cs:911)
UnityEngine.Rendering.PostProcessing.PostProcessLayer.BuildCommandBuffers () (at Library/PackageCache/com.unity.postprocessing@3.2.2/PostProcessing/Runtime/PostProcessLayer.cs:558)
UnityEngine.Rendering.PostProcessing.PostProcessLayer.OnPreCull () (at Library/PackageCache/com.unity.postprocessing@3.2.2/PostProcessing/Runtime/PostProcessLayer.cs:487)
UnityEngine.GUIUtility:ProcessEvent(Int32, IntPtr, Boolean&)


메인카메라에 있는 Post-process Layer 컴포넌트를 삭제 후 다시 생성하면 문제가 해결됩니다.

반응형
반응형

안녕하세요

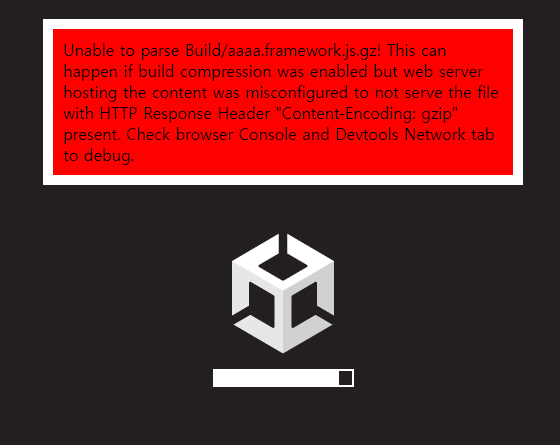
unity Webgl로 빌드하여, 서버에 올리면 다음과 같이 에러가 발생합니다.

Unable to parse Build/xxxxx.framework.js.gz! This can happen if build compression was enabled but web server hosting the content was misconfigured to not serve the file with HTTP Response Header "Content-Encoding: gzip" present. Check browser Console and Devtools Network tab to debug.(Build/xxxxx.framework.js.gz를 구문 분석할 수 없습니다! 이는 빌드 압축이 활성화되었지만 콘텐츠를 호스팅하는 웹 서버가 HTTP 응답 헤더 "Content-Encoding: gzip"이 있는 파일을 제공하지 않도록 잘못 구성된 경우 발생할 수 있습니다. 디버그하려면 브라우저 콘솔 및 Devtools 네트워크 탭을 확인하십시오.)

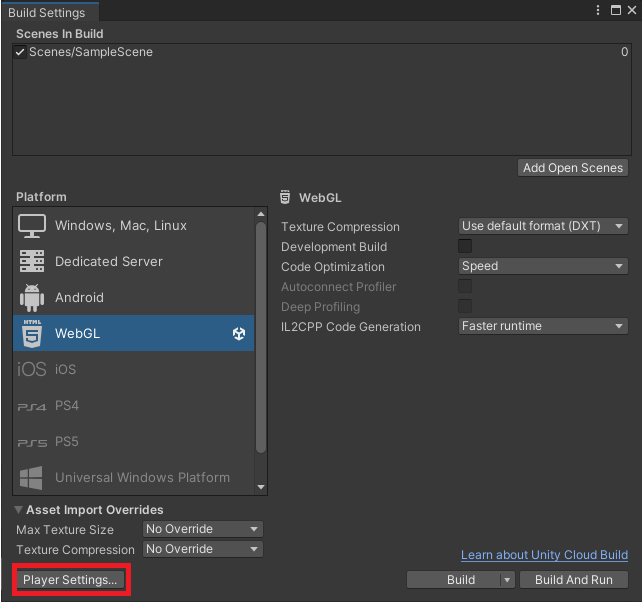
Player Settings - Player - Publishing Setting의 Decompression Fallback을 체크를 하면 해결됩니다.

반응형

+ Recent posts